Blog
Ceiling vs Wall-Mounted Infrared Patio Heaters: Which Is More Efficient?

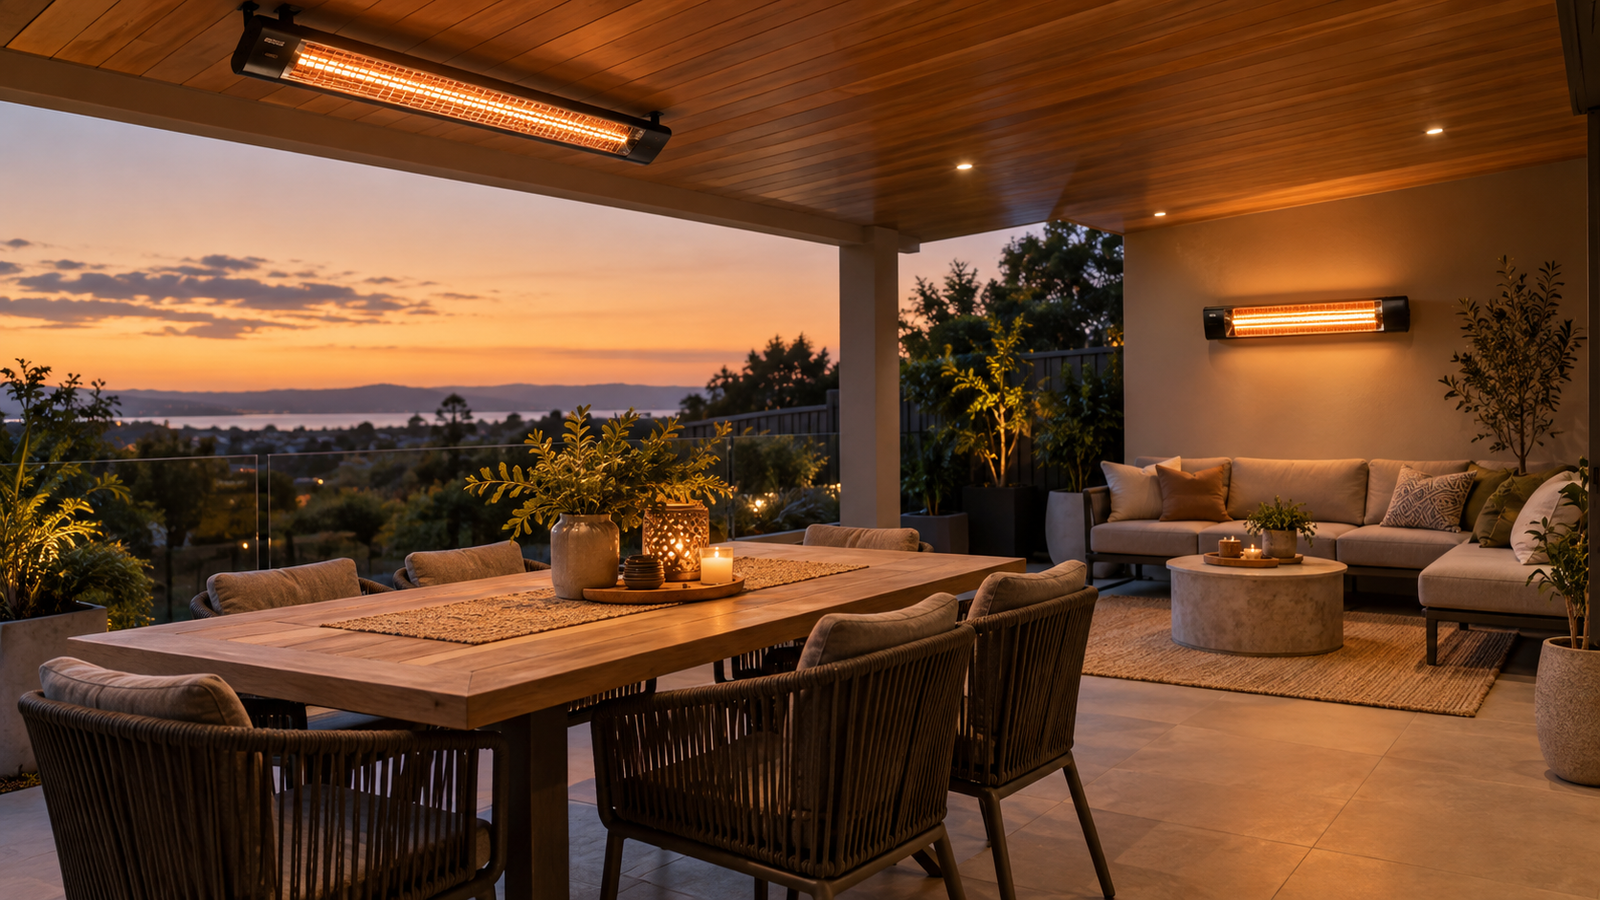
Neither mounting position is automatically more electrically efficient. A ceiling-mounted and a wall-mounted infrared heater with the same wattage will generally consume the same electricity at the same power setting. The real difference in the efficiency comparison between ceiling- and wall-mounted infrared heaters is where the radiant energy actually travels. Ceiling mounting directs heat downwards over the space below it, while wall mounting usually sends heat across the patio and down towards a chosen seating or activity zone.
Which position works better for your patio depends on several practical factors: patio dimensions, ceiling height, seating layout, open sides, mounting angle, heater output, coverage pattern, electrical access, and the manufacturer’s own instructions.
Infrared patio heaters emit radiant energy towards people and surfaces, and their practical effectiveness is shaped by power, mounting height, angle, distance and exposure to wind, not by whether they hang from a ceiling or a wall.
In This Guide
- Are Ceiling-Mounted or Wall-Mounted Infrared Heaters More Efficient?
- How Does Ceiling vs Wall-Mounted Infrared Heater Efficiency Compare?
- What Factors Affect the Efficiency of Ceiling and Wall-Mounted Infrared Heaters?
- Which Infrared Heater Placement Provides Better Outdoor Heat Coverage?
- Are Ceiling-Mounted Infrared Heaters Better for Large Patios and Entertaining Areas?
- Ceiling vs Wall-Mounted Heater Decision Table
- What Should You Check Before Installing an Infrared Patio Heater?
- How Do Infrared Heaters Compare With Electric Fire Pits?
- The Bottom Line
- Frequently Asked Questions
Are Ceiling-Mounted or Wall-Mounted Infrared Heaters More Efficient?
Neither option is inherently more electrically efficient. If two heaters have the same rated wattage and controls, their electricity consumption will be similar, since standard electric heaters convert close to 100 per cent of their electrical input into heat output regardless of how they’re mounted. The more effective position is the one that directs suitable radiant coverage towards the occupied area, not the one mounted higher or lower.
Ceiling mounting may work better when:
- Seating is centred beneath a covered roof.
- The patio needs balanced downward coverage.
- Wall space is unavailable or already in use.
- Keeping equipment away from head height is a priority.
- The ceiling height falls within the manufacturer’s approved range.
Wall mounting may work better when:
- Seating is positioned near a suitable wall.
- The patio is narrow
- Heat needs to be directed across one defined zone.
- The ceiling is too high, unsuitable or absent.
- The product permits an adjustable downward angle.
| Comparison point | Ceiling-mounted heater | Wall-mounted heater |
|---|---|---|
| Electricity use | Based on wattage and operating time | Based on wattage and operating time |
| Main heat direction | Downwards | Across and down |
| Typical coverage shape | Central or overhead zone | Directional zone from one side |
| Best seating arrangement | Centred beneath the heater | Facing or near the mounted wall |
| Use of wall space | None | Requires a suitable wall |
| Use of ceiling space | Requires a suitable overhead structure | Ceiling may remain clear |
| Risk of obstruction | Lighting and fans may interfere | Doors, windows and furniture may interfere |
| Adjustment | Product dependent | Often directional, but product dependent |
| Installation access | May require ceiling access | May allow easier cable routing in some properties |
| Main limitation | Heat may feel weak if mounted too high | One-sided heating may leave cold areas |
How Does Ceiling vs Wall-Mounted Infrared Heater Efficiency Compare?
A fair ceiling-versus-wall-mounted efficiency comparison must use the same heater output, heat setting, operating time, and electricity tariff for both options. Once that’s equal, placement should be judged on how well each arrangement covers the occupied area rather than on the mounting position itself.
To compare fairly, look at:
- Rated wattage
- Number of heaters
- Heat settings
- Operating time
- Distance from users
- Manufacturer coverage guidance
- Mounting height and angle
- Open and enclosed sides
- Controls
- Purchase and installation cost
| Efficiency measure | How to compare | Better result |
|---|---|---|
| Electrical consumption | Compare rated wattage at the same setting | Lower input for the required comfort |
| Occupied-zone coverage | Check how much radiation reaches seats or standing areas | Less heat is directed towards the unused space |
| Operating time | Compare how long each heater runs | Shorter operation for the same comfort |
| Zoning | Determine whether individual areas can be controlled | Only occupied zones run |
| Heat settings | Check whether full output is always required | Lower settings remain useful |
| Directional control | Review permitted mounting angles | Radiation reaches the intended zone |
| Installation efficiency | Compare wiring, brackets and structural work | Suitable placement with fewer unnecessary alterations |
This is why two heaters with identical specs can feel very different in practice: efficiency on paper and comfort in the seating area are not the same thing. Neither figure should be quoted as a fixed percentage, since the real result depends on the specific patio.
How to Calculate Infrared Heater Running Cost
Running cost = heater power in kilowatts × operating hours × electricity tariff
Mounting position does not change a heater’s rated electrical input. Heat setting, runtime and the number of units running are what actually change consumption.
For example, Outdoor Living HQ’s wall- and ceiling-mounted infrared heater is rated at 2,400 watts, which converts to 2.4 kilowatts. Using an illustrative rate of $0.35 per kilowatt-hour and 4 hours of use, the total comes to 2.4 kW × 4 hours × $0.35, or roughly $3.36 for that period. Replace the tariff with your own rate from a recent bill, since prices vary by retailer, state and plan.
| Input | Example |
|---|---|
| Heater rating | 2,400 watts (verified product) |
| Convert to kilowatts | 2,400 ÷ 1,000 = 2.4 kW |
| Operating period | 4 hours (example only) |
| Electricity tariff | Insert your current rate |
| Estimated cost | Kilowatts × hours × tariff |
Government comparison tools such as Energy Made Easy for NSW, Queensland, South Australia, Tasmania and the ACT, or Victorian Energy Compare for Victorian households, let you check your actual current tariff before running this calculation.
What Factors Affect the Efficiency of Ceiling and Wall-Mounted Infrared Heaters?
Practical efficiency depends on the relationship between the heater, the people using the patio, and the patio itself, rather than the mounting position alone. A heater aimed correctly at a seating zone will usually feel more effective than a higher-output unit aimed at a space.
Factors that influence real-world performance include:
- Heater wattage and heating-element design
- Manufacturer coverage pattern
- Mounting height, angle and ceiling pitch
- Distance from users
- Patio dimensions and open sides
- Wind exposure
- Seating arrangement and number of heaters
- Zoning and heat settings
- Timers and smart controls
- Insulation and overhead structure
- Obstructions
- Electrical capacity
| Factor | Why it matters | Planning response |
|---|---|---|
| Mounting height | Radiant intensity reduces as distance increases | Stay within the approved mounting range |
| Mounting angle | Controls where radiant energy travels | Aim only as allowed by the manual |
| Open sides | Increase exposure and affect perceived comfort | Position heaters closer to occupied zones where permitted |
| Patio size | One unit may not cover separate activity areas | Use independently controlled zones |
| Seating layout | Fixed tables and lounges define where warmth is needed | Design around occupied positions |
| Ceiling fan | Air movement may affect comfort and create a mounting conflict | Coordinate locations and clearances |
| Heater output | Higher wattage increases electricity use and potential heat | Match output to the application |
| Controls | Timers and heat settings can reduce unnecessary operation | Use only the required zones and settings |
| Obstructions | Beams, umbrellas and screens may block radiant paths | Check the complete line of radiation |
| Electrical supply | Multiple high-power units may need circuit assessment | Engage a licensed electrician |
Infrared heaters warm people and surfaces directly within their radiation path, but outdoor comfort can still be reduced by wind and cold surrounding conditions, even when the heater itself is working correctly. The Australian Government’s home heating guidance notes that radiant heaters are effective even in large or exposed areas because they warm people directly rather than heating the surrounding air first, which is part of why placement and angle matter more than raw wattage alone.
Which Infrared Heater Placement Provides Better Outdoor Heat Coverage?
Ceiling placement often gives more balanced coverage beneath a roof, while wall placement usually gives more directional heat from one side. The better option depends on where people actually sit and how high the heater must be mounted to meet the manufacturer’s approved range.
| Patio layout | Preferred starting option | Reason |
|---|---|---|
| Narrow patio beside the house | Wall mounting | Directs heat across a defined strip |
| Dining table under a low covered roof | Ceiling mounting | Provides central downward coverage |
| Lounge positioned against a wall | Wall mounting | Targets the occupied seating zone |
| Large rectangular alfresco area | Multiple ceiling or mixed units | Allows separate heating zones |
| Patio with a very high ceiling | Wall mounting may be more effective | Reduces distance if the wall position is compliant |
| Area with no suitable wall | Ceiling mounting | Uses the available overhead structure |
| Area with no overhead roof | Wall or approved freestanding alternative | Ceiling mounting is unavailable |
| Patio with ceiling fans | Wall or coordinated ceiling mounting | Avoids interference and clearance conflicts |
| Outdoor kitchen and dining zones | Separate-mounted units | Allows each activity area to operate independently |
| Corner seating area | Angled wall-mounted unit | Targets the corner when the product permits adjustment |
Treat this table as a starting point rather than an installation rule. The manufacturer’s coverage diagrams and mounting requirements should guide the final position for your patio.
How Should Heater Placement Be Planned?
- Measure the patio’s length, width and height.
- Mark fixed seating, dining and activity areas.
- Identify walls, ceilings and structural fixing points.
- Note fans, lights, awnings, doors and windows.
- Check open sides and prevailing wind exposure.
- Decide whether the full patio or selected zones need heat.
- Review the heater’s approved mounting orientations.
- Check minimum and maximum installation heights.
- Confirm clearances around combustible materials.
- Map the expected radiant path.
- Identify nearby electrical supply and control points.
- Assess circuit capacity.
- Decide whether separate controls are needed.
- Confirm whether structural or electrical work is required.
- Obtain professional installation advice.
- Mark proposed heater positions temporarily before drilling or wiring.
Are Ceiling-Mounted Infrared Heaters Better for Large Patios and Entertaining Areas?
Ceiling-mounted infrared heaters can work well in large covered patios, but multiple correctly positioned units are usually needed. One centrally mounted heater will not automatically warm an entire large entertaining area evenly.
Advantages can include:
- Balanced overhead coverage
- Clear walls
- Reduced interference with furniture
- Discreet integration into a covered structure
- Separation into dining, cooking and lounge zones
Limitations can include:
- Excessive ceiling height
- Structural fixing requirements
- Conflicts with fans and lights
- Electrical access
- Difficult maintenance access
- Uneven coverage between separate zones
- Heat is directed onto unused floor areas
| Zone | Suggested arrangement | Control approach |
|---|---|---|
| Dining table | Heater centred or coordinated above the occupied area | Independent heat setting |
| Lounge | Separate wall or ceiling unit | Separate switch or remote zone |
| Outdoor kitchen | Position away from heat-producing appliances | Independent control |
| Open edge | The heater is directed towards occupied positions | Operate only when the zone is used |
| Circulation space | Usually not the main heating priority | Avoid unnecessary coverage |
Zoning a large patio into independently controlled areas is often more useful than installing a single oversized heater, since households can then heat only where people are actually sitting.
Ceiling vs Wall-Mounted Heater Decision Table
| Homeowner’s priority | Recommended starting option | Reason |
|---|---|---|
| Balanced heat over a central table | Ceiling mounted | Directs radiant heat down towards the occupied zone |
| Directional heat for a narrow patio | Wall mounted | The project heats from one side |
| Keep walls visually clear | Ceiling mounted | Uses the overhead structure |
| The ceiling is too high | Wall mounted | May reduce the distance to users |
| No suitable wall is available | Ceiling mounted | Uses a compliant overhead fixing point |
| Ceiling fans occupy the central area | Wall-mounted or carefully coordinated ceiling position | Reduces mounting conflicts |
| Heat two separate seating zones | Multiple independently controlled heaters | Avoids heating unused areas |
| Simplest electrical route | Site dependent | Existing supply and structure determine the result |
| Flexible aiming | Wall-mounted where approved | Brackets may allow directional adjustment |
| Large covered alfresco area | Zoned ceiling or mixed placement | Supports coverage across defined areas |
A layout-specific assessment will usually serve you better than choosing based on wattage alone, since the same heater can perform very differently depending on where and how it’s mounted. Our range of infrared heaters includes models suited to both wall and ceiling mounting, so the fixing method doesn’t need to limit your options.
What Should You Check Before Installing an Infrared Patio Heater?
Work through this checklist before fixing anything in place:
- Approved mounting orientation and height
- Required clearances
- Wall or ceiling strength and bracket compatibility
- Heater weight
- Combustible materials, curtains or blinds nearby
- Awnings and pergola components
- Ceiling fans, doors and windows
- Weather exposure and IP rating
- Electrical circuit capacity
- Plug and outlet location
- Cord routing
- Isolation and controls
- Access for cleaning
- Warranty requirements
- Professional installation requirements
An appropriately licensed electrician must handle fixed wiring and new electrical circuits. Energy Safe Victoria confirms that engaging a registered electrical contractor is required for electrical installation work, and the same principle applies across Australia under each state’s licensing rules. Structural advice may also be needed where the supporting wall or ceiling is uncertain.
How Do Infrared Heaters Compare With Electric Fire Pits?
Homeowners searching for an electric fire pit with no propane option may be comparing ambience and heating, and it’s worth being clear that a mounted infrared heater and an electric fire feature serve different purposes.
| Feature | Mounted infrared heater | Electric fire feature |
|---|---|---|
| Main purpose | Directional radiant warmth | Ambience, with product-dependent heating |
| Floor space | Uses wall or ceiling space | Occupies floor or furniture space |
| Heat direction | Determined by mounting position | Product dependent |
| Visual flame | No | Usually simulated |
| Installation | Mounting and electrical planning | Depends on plug-in or fixed design |
| Best use | Heating defined patio zones | Creating a visual focal point |
Not every electric fire pit provides meaningful outdoor heat, so check the individual product specification rather than assuming a flame effect equals real warmth. Our guide to electric and bioethanol fire pits versus propane covers that comparison in more depth, and our fire pit range includes both heat-focused and ambience-focused options.
The Bottom Line
A ceiling vs wall-mounted infrared heater efficiency comparison really comes down to useful radiant coverage rather than mounting position alone, since an equal-wattage heater draws much the same electricity either way. Ceiling mounting often suits centred seating under a covered roof, while wall mounting can work better for narrow patios, high ceilings and directional heating. Compare your patio layout, the heater’s manual, your mounting structure, electrical supply and available controls before choosing.
A tailored recommendation should account for your patio’s dimensions, mounting height, seating, exposure, power supply and the zones you actually want to heat. Get in touch for layout-specific advice, or browse our infrared heater range to compare wall and ceiling-mounted options.
Frequently Asked Questions
Are ceiling-mounted infrared heaters more efficient than wall-mounted heaters?
Mounting position doesn’t normally change the electricity an equal-wattage heater consumes at the same setting. Ceiling mounting may provide more useful coverage where seating sits directly below it, while a wall unit can be just as effective when aimed well. Height, angle and patio layout determine practical effectiveness far more than whether the heater hangs from a ceiling or a wall.
Which is better, a ceiling or wall-mounted infrared patio heater?
It depends on your layout. Ceiling mounting often suits central seating beneath a covered roof, while wall mounting suits narrow patios or seating positioned near a wall. Neither is universally better. The manufacturer’s mounting instructions and your property’s structure, including ceiling height and available wall space, should guide the final decision rather than a general rule.
Do wall-mounted infrared heaters use more electricity?
No. A wall-mounted heater doesn’t use more electricity simply because it’s mounted on a wall. Wattage, heat setting, operating time and the number of heaters running determine consumption, not the mounting surface. That said, poor placement on a wall or ceiling may require longer operation to reach the same level of comfort, which can increase running time and costs.
Where should an infrared patio heater be installed?
Position it within the manufacturer’s approved height and clearance limits, with its radiant coverage directed towards the occupied seating or activity area rather than space. Consider structural support, weather exposure, IP rating, nearby combustible materials, ceiling fans, awnings, and electrical access before committing to a fixing point. A temporary trial position can confirm the coverage before any drilling or wiring begins.
What is the most efficient way to heat an outdoor patio?
Zoned heating directed towards occupied seating is usually more practical than trying to warm an entire open patio at once. Match heater output to the space, use independent controls for separate zones, and avoid running heaters longer than needed. No single heater type or mounting position is always the most efficient choice. The right setup depends on your patio’s layout, exposure and how it’s actually used.